October 29, 2013
2444 view(s)
TSI 8030/8038 Portacount Respirator Fit Test System Quick Start Guide
In this guide, you'll learn how to set up the testing database on your Portacount, run a fit test, and download the test data to a PC for record-keeping and compliance.
**IMPORTANT** Plug flash drive into port on instrument before starting 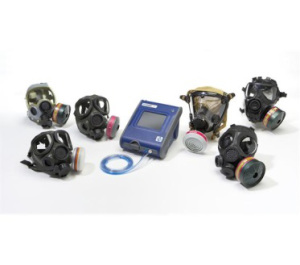
People
- Select “database” tab at bottom of screen
- Select “people”
- Select “new”
- Enter name and ID# and press “save” to add to list
Respirators
- Select “database” tab at bottom of screen
- Select “respirators”
- Select “new”
- Enter manufacturer, model, style and pass value and press “save” to add to list
Typical pass values – Full Face: 500 Half Face: 100 N95: 100
Protocols and exercises
- Select “database” tab at bottom of screen
- Select “protocols” Most people use OSHA
- Select “new” (if not using OSHA)
- Name the protocol and set the parameters
- Touch screen under where it says “exercise name” to add an exercise to the selected protocol
- Select “save” to add to list
Perform Fit Test
Daily Check
- From main screen select “Daily Check”
- Attach twin tube assembly to appropriate inlets
- Insert alcohol cartridge
- If doing N95 testing on 8038 model, check the box that says “N95 enabled”, for Full and Half Face uncheck.
- ***Do not enable valve check this is for factory technicians***
- Press “Start” and follow prompts that appear on screen
Failed daily check?
- Check to see that the alcohol is clear (not cloudy) and that the alcohol cartridge is filled to the “fill line”
- Swap the alcohol wick, also replace alcohol using one small bottle to fill jar. Pop spray nozzle to pour out.
- Swap zero filters
- Check and swap mesh filters under sample inlets
Start new daily check – if daily check fails again call RAECO Rents at (866)736-8347 for assistance. Do you need a particle generator? Call us!
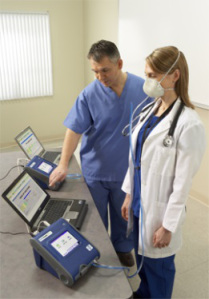
Fit Test
- Select “fit test” from main screen
- Select the person being tested from the dropdown menu at top of screen (if no people appear go to step 1a)
- Select the respirator being tested from the dropdown menu at top of screen (if no respirators appear go to step 1b)
- Select the protocol you wish to use in the test from the drop down menu at top of screen (if protocol(s) don’t appear go to step 1c)
- Make sure person being tested wears mask for at least 5 minutes prior to testing as trapped particles inside the respirator will skew the test results Person also must not smoke for 30 minutes prior to test
- Connect twin tube assembly to the inlets on the instrument and attach the other end of the (clear) sample tube to the respirator If using a disposable respirator, tubing can be connected using the supplied probes (PortaCount model 8038 only) *if not applicable go to step 7*
- Remove probes, nuts and probe assembly tools from accessory pouch
- Place one probe on the piercing side of the assembly tool and place a nut on the opening of the other side of the tool
- Using the piercing tool, push the sampling probe, from the inside, through the breathing zone of the respirator
- With the probe pushed through use the other part of the assembly tool to attach the nut to the probe from the outside of the respirator
- Attach tubing to the probe to test respirator (see page 18 of Operation and Service manual for images and a more descriptive explanation of where the breathing zone is on specific respirators)
- Press “Start” to begin fit test
- Instrument will prompt the person being tested to do deep breathing, normal breathing and other various exercises
- Portacount will display the test results – if test failed adjust mask, check tubing and connection to the respirator and then restart fit test
Data Download
Install Software
- Installation requires that software is installed on a computer running Windows XP, Vista, or 7
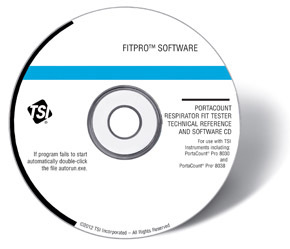
- Insert disc in drive and follow installation instructions
- After installation, open the application
Download Data
To get FitPro Format Report
- Plug flash drive from Portacount into the computer
- In the software interface, click the “Database” drop down menu and select the “Flash Drive Database Exchange” option
- Click “Browse” under the import (left) side of the interface and open the database file on the flash drive
- Click “Import Database from Flash Drive” to download
- After import go back to the main screen
- Click the “Report” drop down menu and click “Select Report” to choose the report you want
- Click “View Report” to see the report before printing
To get Excel Format Report
- Plug Flash Drive into the computer
- To create a report in Microsoft Excel click the “database” drop down menu in the software interface
- Hover mouse over “Export” and click “excel format”
- Select the database file you want to export and choose a destination for the exported file – saving to desktop makes file easy to find*
- Locate and open the exported file to view