November 10, 2013
3198 view(s)
3M/Quest Edge 5 Noise Dosimeter Quick Start Guide Basic Setup
In this guide, you'll learn how to configure OSHA and ACGIH settings, calibrate the dosimeter and download the test data to a PC for record-keeping and compliance.
3M/Quest Edge 5 Noise Dosimeter Quick Start Guide Basic Setup
***3M has upgraded Quest’s Quest Suite Pro II and it is now called Detection Management Software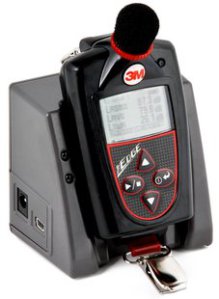
*** Please consider upgrading to keep current with new features in the software and on the dosimeters like enabling the third virtual dosimeter on the Edge 5’s.
- Before you can setup your Edge 5 dosimeter(s) you need to have 3M’s DMS software installed on a computer. Install the software before continuing with these instructions.
- Open the application. Place the Edge 5 unit(s) on the charging dock and connect the dock to the computer via the provided USB cable **Make sure the dosimeters are turned on before connecting the dock to the computer**
- When the application loads, click “Setup” at the top of the interface.
- On the top left side of the application’s interface click “Noise Dosimetry” in the families section and then select Edge 5 from the list below that
- To setup for OSHA HC, PEL, and ACGIH, select the “QuestDefault_EG5” configuration profile on the right side of the interface and click “Load” at the bottom of the configuration profile list
- Once the configuration is displayed, click the checkbox on the left side of the setup screen for the serialized unit(s) you want to configure and then click “Set Configuration” at the bottom of the setup screen. The application will prompt you saying “the instrument’s memory will be cleared after sending the setup”. Click ok and wait for the notification at the very bottom of the screen to say “Complete” before disconnecting the unit(s). If it fails to send the configuration, make sure the unit(s) is on, check to make sure that the USB cable is connected properly and re-seat the Edge(s) on the dock; then retry setting the configuration. If sending fails still, call RAECO Rents for assistance. (866)736-8347
- Also check the time settings to be sure the clock is set to your time zone. Click on miscellaneous setup and the Date-Time tab. The time can be set to the Current System Time or Specific Time.
- After setting the configuration and you wish to use for your noise study, disconnect the unit(s) from the dock.
Calibration
- While the dosimeter is turned on and not running a test, unscrew the windscreen and turn on the QC-10 calibrator placing it securely over the microphone.
- After a few seconds the dosimeter will ask if you want to go into Calibration, touch enter button.
- Adjust the dB to 114 and touch enter button.
- Remove and turn off calibrator and screw back on the windscreen.
Testing
- Before you begin testing, make sure your settings were sent to the unit(s) by reading the small print at the bottom of the screen on each unit. TH = Threshold ER = Exchange Rate CL = Criterion Level Fast/Slow = Response Time A/C/Z = Frequency Weighting.
- To see the settings for dosimeter 2 & 3 press the enter/power key to cycle through each virtual dosimeter. The values should match the values displayed on the DMS software. If it doesn’t match, place each unit back on the dock and send the configuration to the units again.
- Once you confirm that the settings are correct, clip the Edge 5 unit you are using to your shirt on the inside curve of your collar bone right next to your shoulder and press and hold the play/stop button for three seconds to start the test.
- When finished testing, press and hold the play/stop button for three seconds to stop taking measurements.
- You can use the up/down arrow keys to view some of the data on the dosimeter such as time weighted average, dose %, and the maximum sound level that was reached.
Downloading Data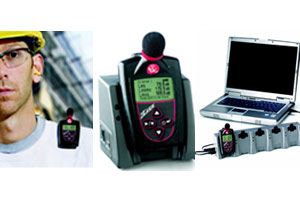
- After stopping the test by pressing the play/stop button, leave the dosimeter(s) turned on and seat each Edge 5 unit on the dock with the USB cable connected to the computer.
- Open the DMS software and click “Download” at the top of the application’s interface.
- Click the checkbox for the serialized unit(s) you wish to download data from and then click the “download” button. The application asks “Clear instrument’s memory?” click “No” just in case there is an issue with downloading.
- After the data is loaded to the software, select the test(s) you wish to view.
- Clicking “Quick Report” will create a basic report showing all of the data recorded by the dosimeter(s). You can save or print the report from here.
- Clicking “Analyze” will display separate panels that each contain different information. Clicking “Configure” on any of the panels will allow you to name each set of data and configure the data that will be displayed on the panel. To generate a report with the data shown in the panels click “report view” at the bottom of the screen. You can format and modify the displayed data with the options on the right of the screen. Click “Print” to print the report or click “Save As” to save a PDF copy of the data.
- When finished, remove the Edge 5 unit(s) from the dock and turn them off.